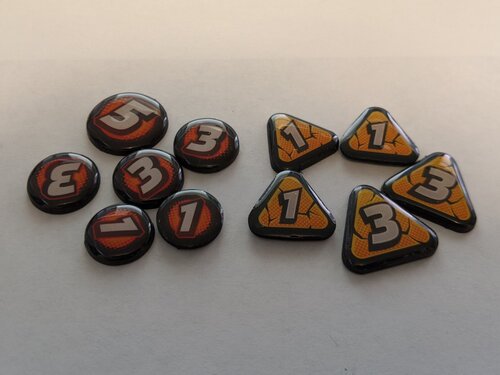
Lots of games come with sheets upon sheets of tokens. And when you start getting into lifestyle games, or games that come to act as a hobby in addition to a game, you start seeing a great variety of custom tokens. For games like Marvel Champions or Arkham Horror, there are some truly gorgeous tokens available on Etsy. There’s no doubt in my mind, I’ll eventually up with some new tokens for these games. But for now, here are a few tips for some quick token upgrades you can do at home.
Supplies
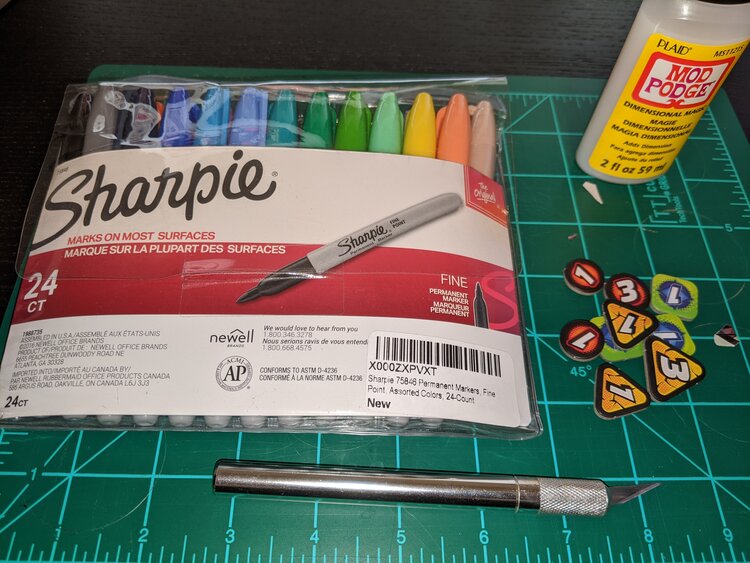
- A hobby knife, like an X-Acto
- A cutting mat. I like self healing ones
- Permanent markers, like Sharpies. We’ll talk color later.
- Mod Podge Dimensional Magic.
- Your tokens of choice.
There are links to these products at the bottom of the article if you’re interested.
Preparation
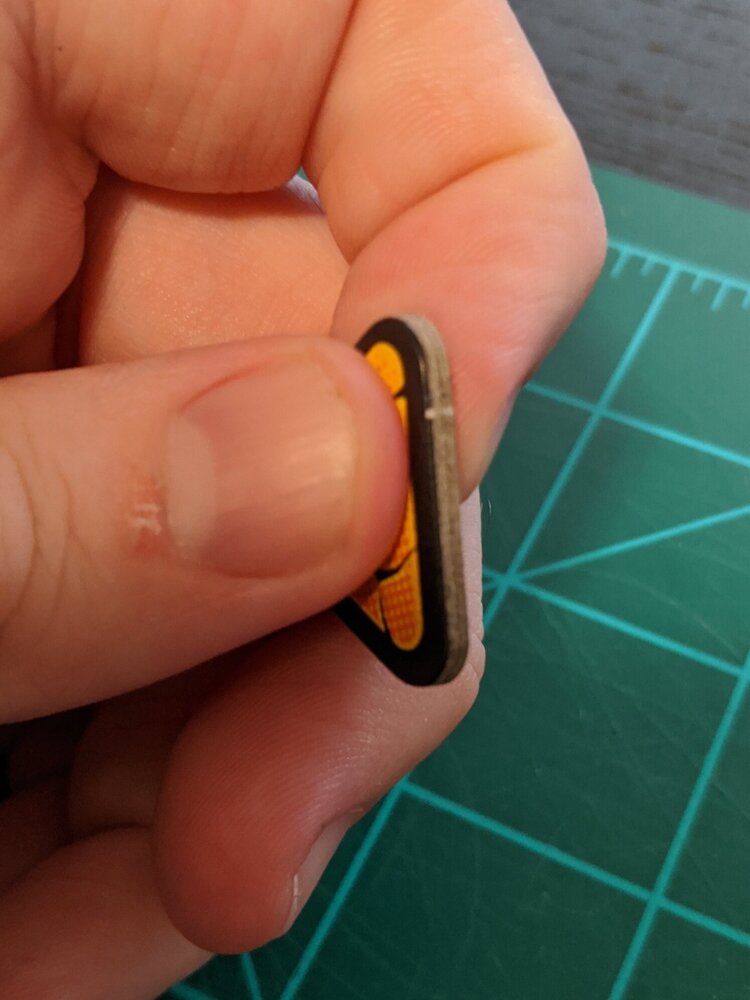
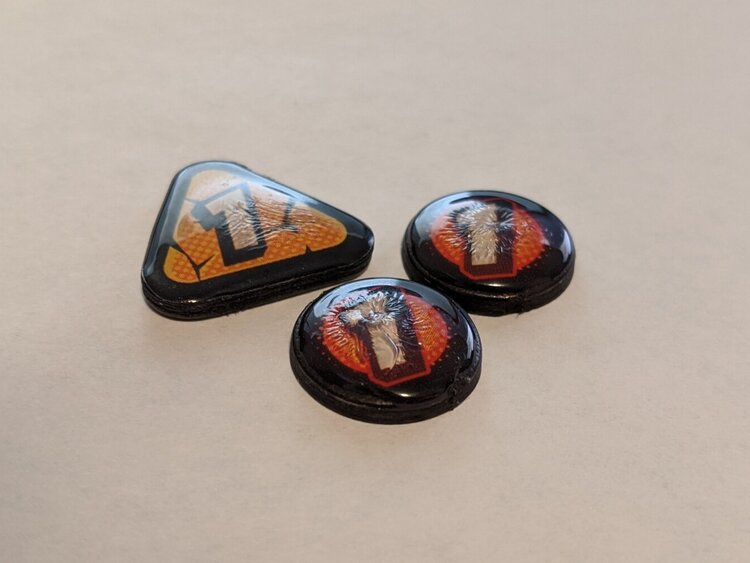
Both techniques for classing up our tokens start here. All it takes is gently scraping the edge of the token with your hobby knife to cut away the little bit of excess cardboard that once held the token in the sheet. A sharp blade works best here, but cardboard dulls blades relatively quickly. For the Marvel Champions tokens I’m using for this demonstration, most of them only had two of these nubs.
It’s Coloring Time
When I first saw this suggestion, I couldn’t believe I’d never thought of it myself. All you have to do is color in the edge of your tokens. There is one small gotcha though. When you color the token’s edge, some of the ink may bleed through to the surface of the token. In my experience, this will usually happen on the back face of the token. That is the one whose surface is not curved over. You can tell this by looking at the side profile of the token. The bleeding itself tends to fade a bit as everything dries. And for tokens with black borders, I’ve yet to experience any noticeable bleeding. As far as token upgrades go, this one is dead simple.

Another important factor is color choice. For black-bordered tokens, like the Marvel Champions threat and damage counters, the choice is fairly obvious. They look very click once the edge is blended in with the black border. And you likely have a black Sharpie around. For other tokens, it can be a little bit of trial and error to find the right color. For the generic tokens, I’ve tried a bunch of colors in the blue and green families. I can’t pick a favorite, so let me know which ones you like in the comments section, or on social media.
Bringing Our Token Upgrades to Another Dimension
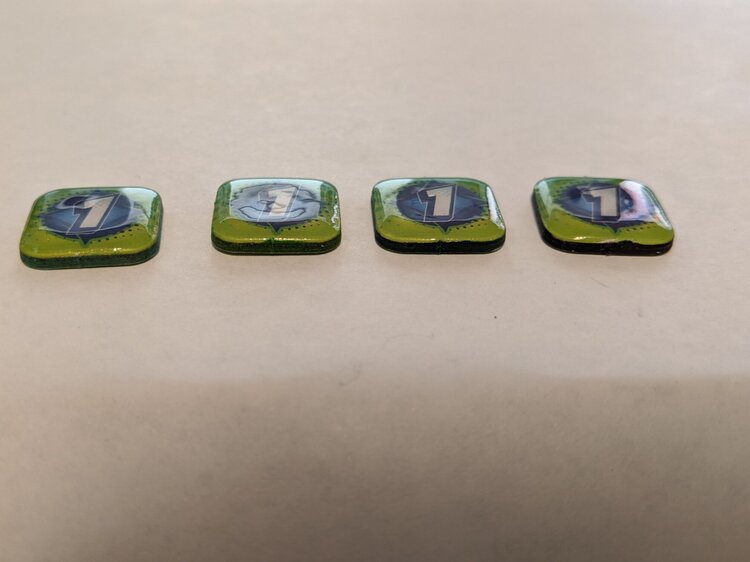
The second tip is a bit more intensive, but it’s still a very easy way to breathe new life into some tokens. Mod Podge has a version called Dimensional Magic. It’s a thick liquid you can spread across your item and it dries clear, and with some volume to it. For tokens, this will make them heavier, thicker, and glossier. In my opinion, all three of those properties make a token more satisfying to handle and have on the table. Things I’ve learned when using this product
- Don’t shake the bottle. If you get it delivered, let it sit for a few days so the bubbles can dissipate.
- Don’t apply too much.
- Don’t risk your favorite/limited tokens until you’re comfortable.
The not shaking part is super important. If you shake it, bubbles will get mixed in and they’re tricky to remove. Hint two is to ensure a nice finish on your tokens. My first few attempts ended up with this crackly texture because of this. And the last item is just because it’s better to practice on more “disposable” tokens first. I can afford to lose a few threat tokens after all.
I place all my prepped tokens on the cutting mat so that when I’m done, I can put the entire mat somewhere to dry. For each token, start with a few drops of the Mod Podge. Use the tip of the bottle to push the liquid all the way to the edges of the token while pressing lightly to add more. Don’t be afraid to push it right up to the edge. The surface tension of the liquid will help keep it from dripping off. This is similar to how you can fill a cup slightly past its brim if you’re careful. Once you’ve covered the entire surface, I usually add 2-3 more drops for small tokens to give it a bit more body. If there are any bubbles, either pop them with your knife or try to use the knife to lift them off.
Once you’re done covering the first side of your tokens, put the mat aside and let them dry. The bottle says 3 hours, but I usually leave them overnight. Come back after and repeat for the token’s other side. After doing several batches of tokens, I still have about 80% of the bottle left. So I’d expect one bottle will let you spruce up at least 100 tokens, depending on size.


That’s it for today’s tips on adding some token upgrades to your board games. I’ll be posting some more pictures to Instagram. If you try this out, feel free to reach out. We’d love to see what you make.
If you’d like to support the site, you can use the Amazon affiliate links below. As an Amazon Associate I earn from qualifying purchases. Funds from these links go towards supporting this site.