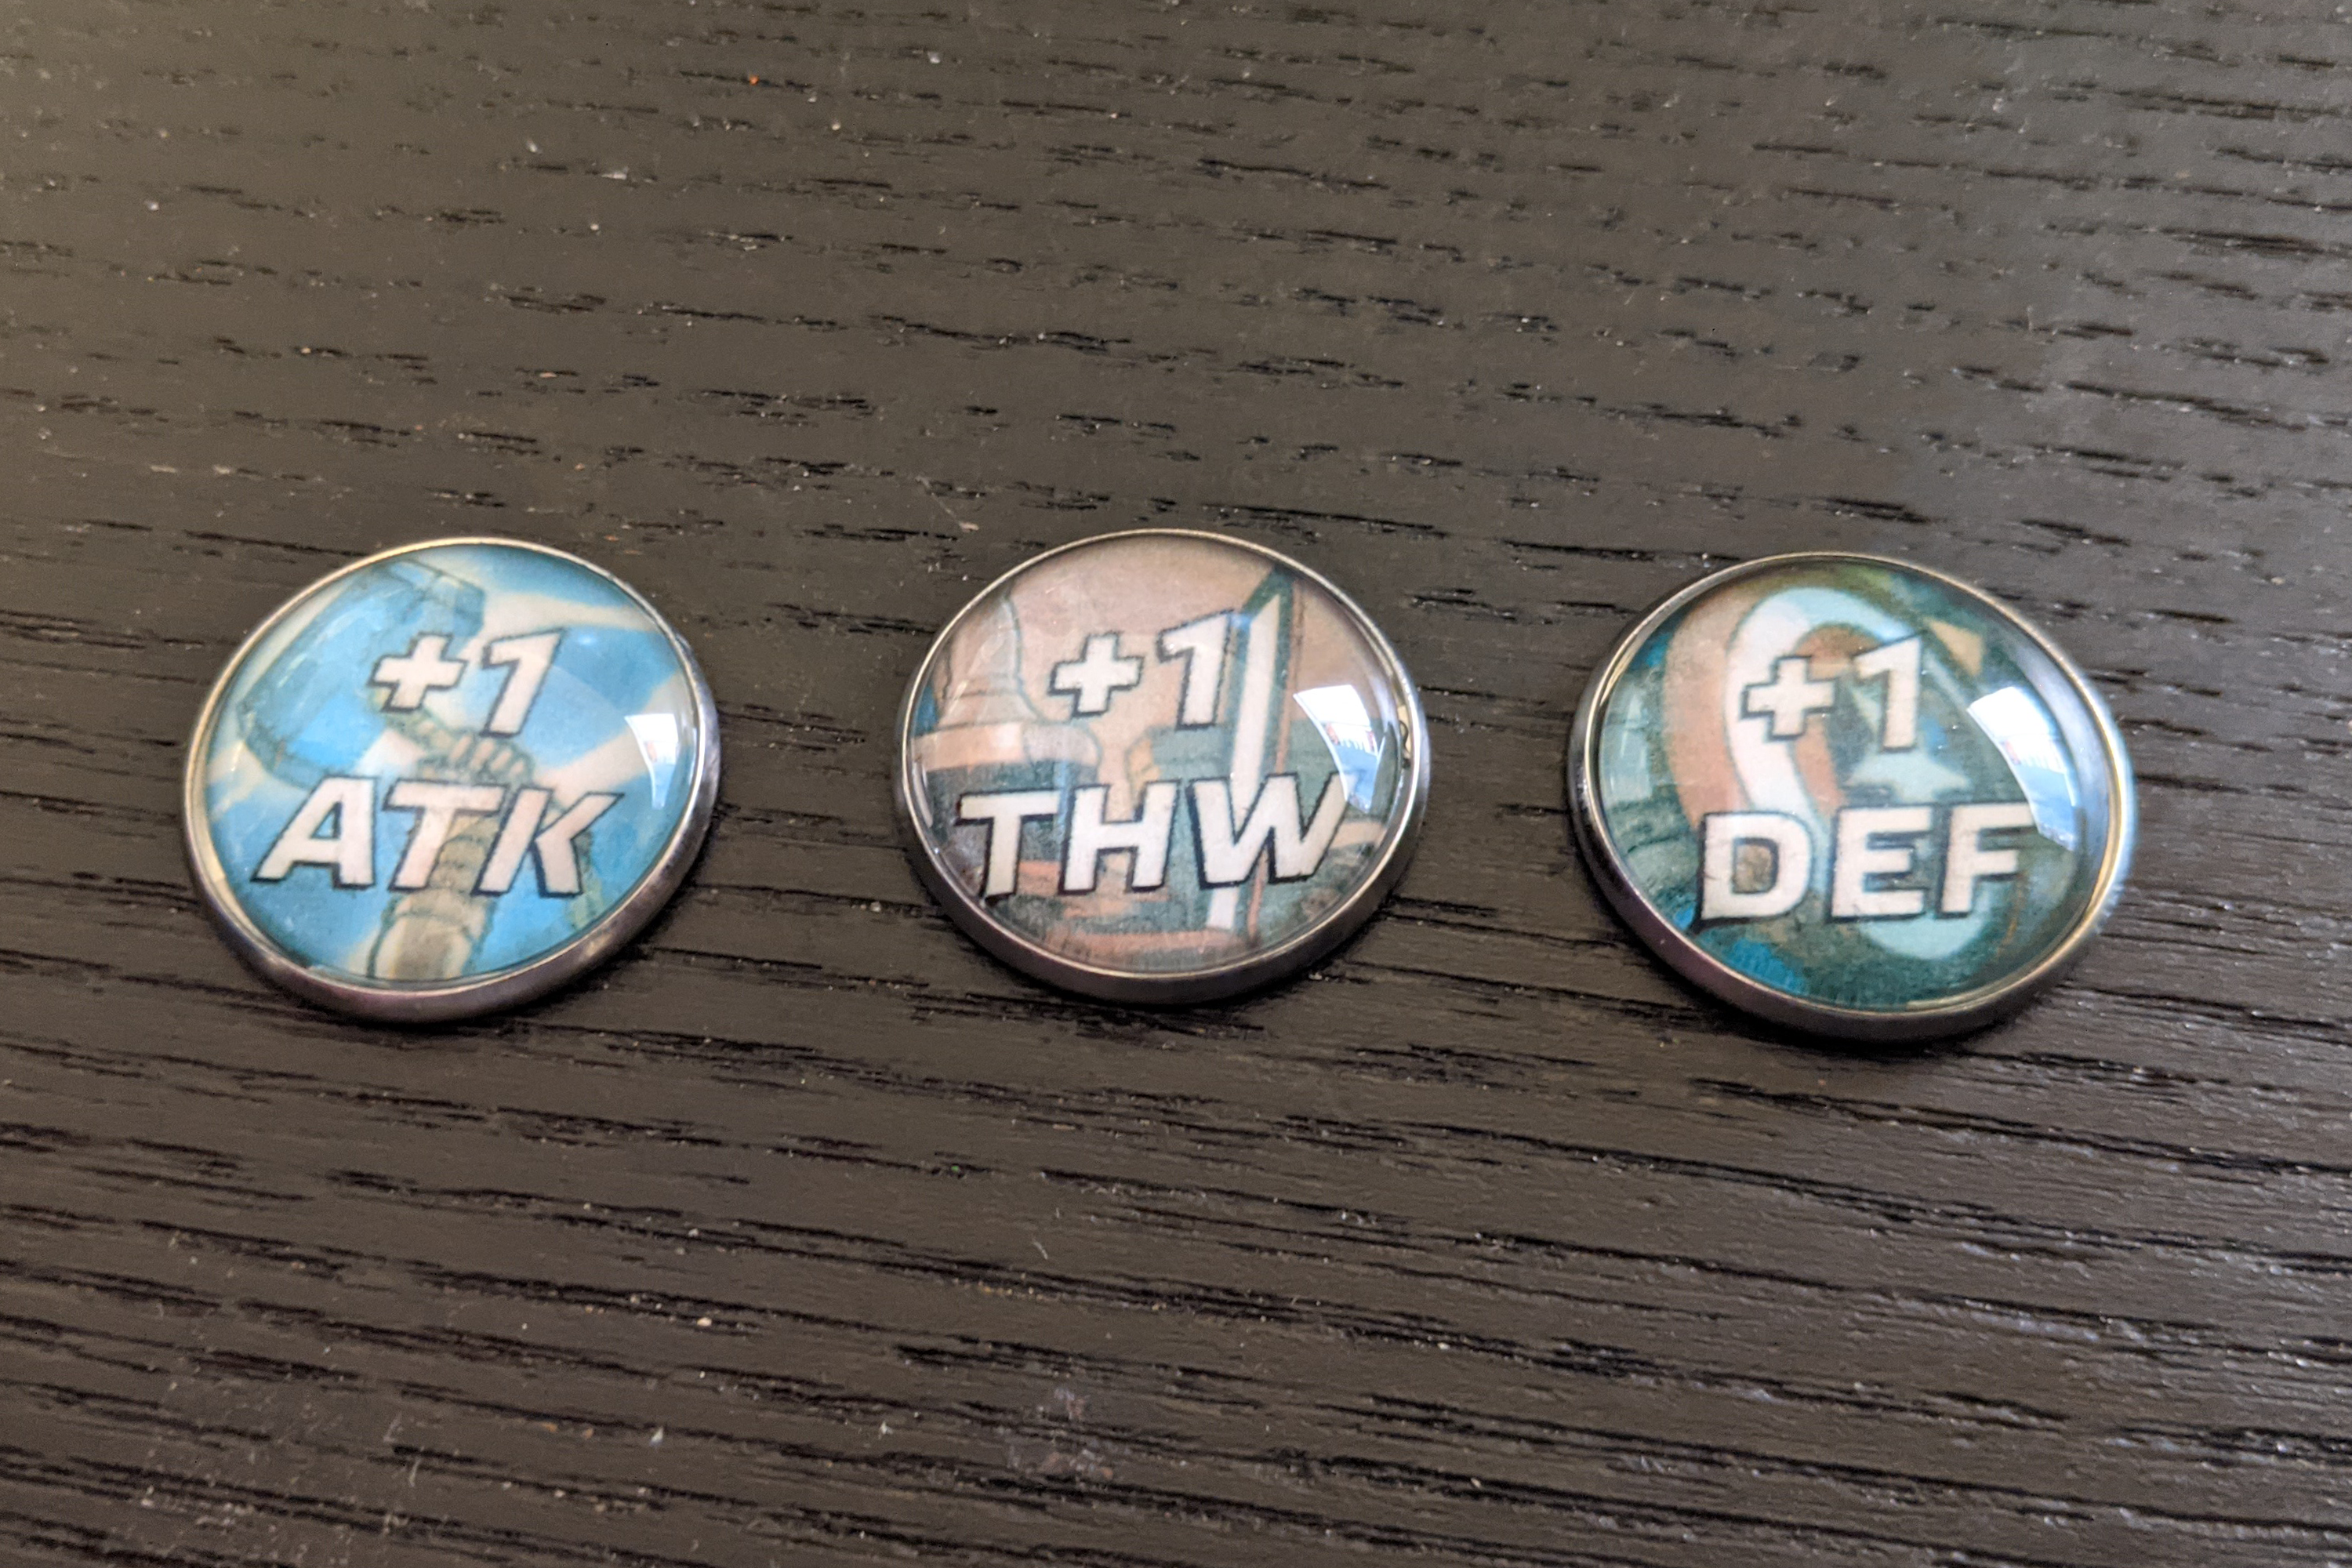
Glass tokens for board games can be some of the prettiest around. And aside from upgrading the tokens that came in the box, they might be the easiest to make at home. These glass cabochon tokens provide gorgeous, full-art tokens that you can customize however you want. Here’s how I made some basic stat upgrade tokens.
Design Time
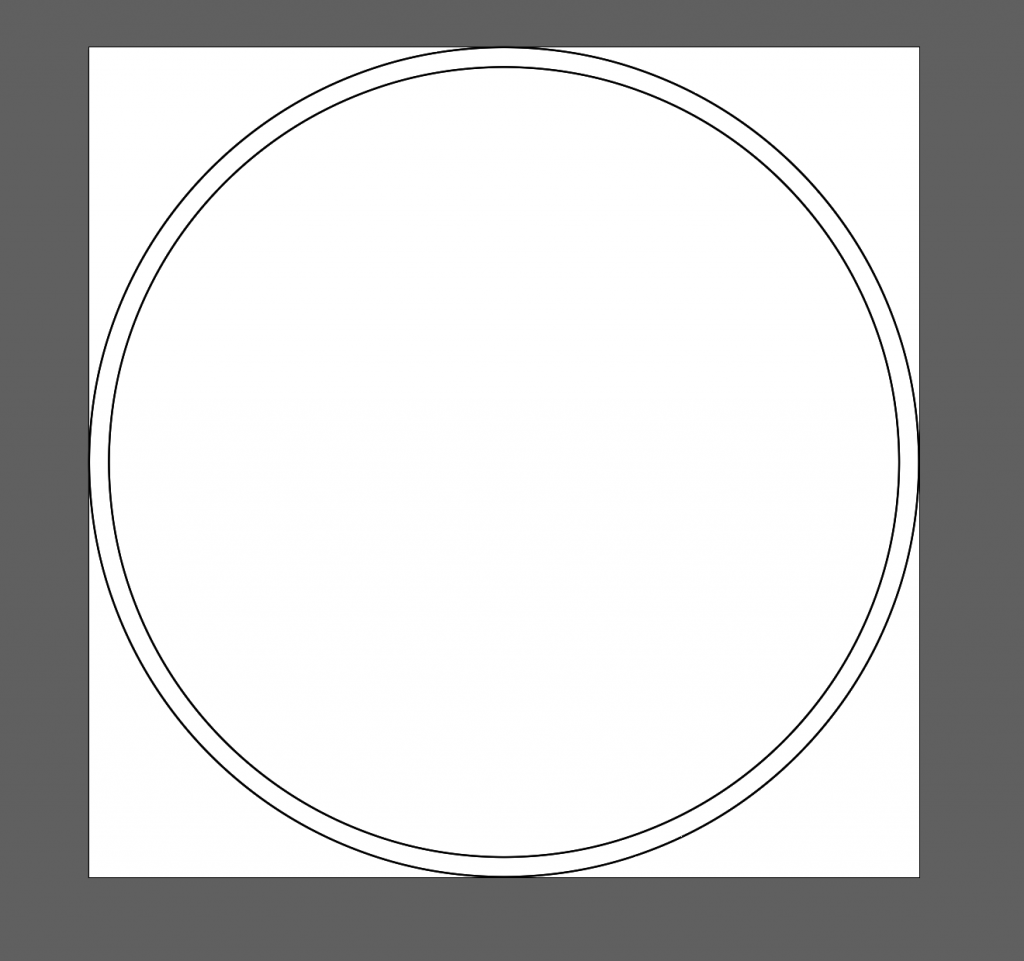
I opened up Adobe Illustrator (or Inkscape, if that’s your jam) and set my canvas for a square 21mm project. The target size for my tokens is 20mm, but we need some extra bleed room to make sure we don’t end up with white edges. I talked a bit more about bleed in my Ronan article if you’re interested.
In my canvas, I’m adding two circles. One at our total size of 21mm, and the other at our final size of 20mm. The inner circle is just there to help us visualize our final token. On a new layer, I drag in my art. For this token, I’m pulling in a nice crop featuring Captain America’s shield. I set the art to 60% transparency, but you can play around with it to see how it feels. The key is that any text we put over it needs to be readable, but we don’t want to lose the art entirely.
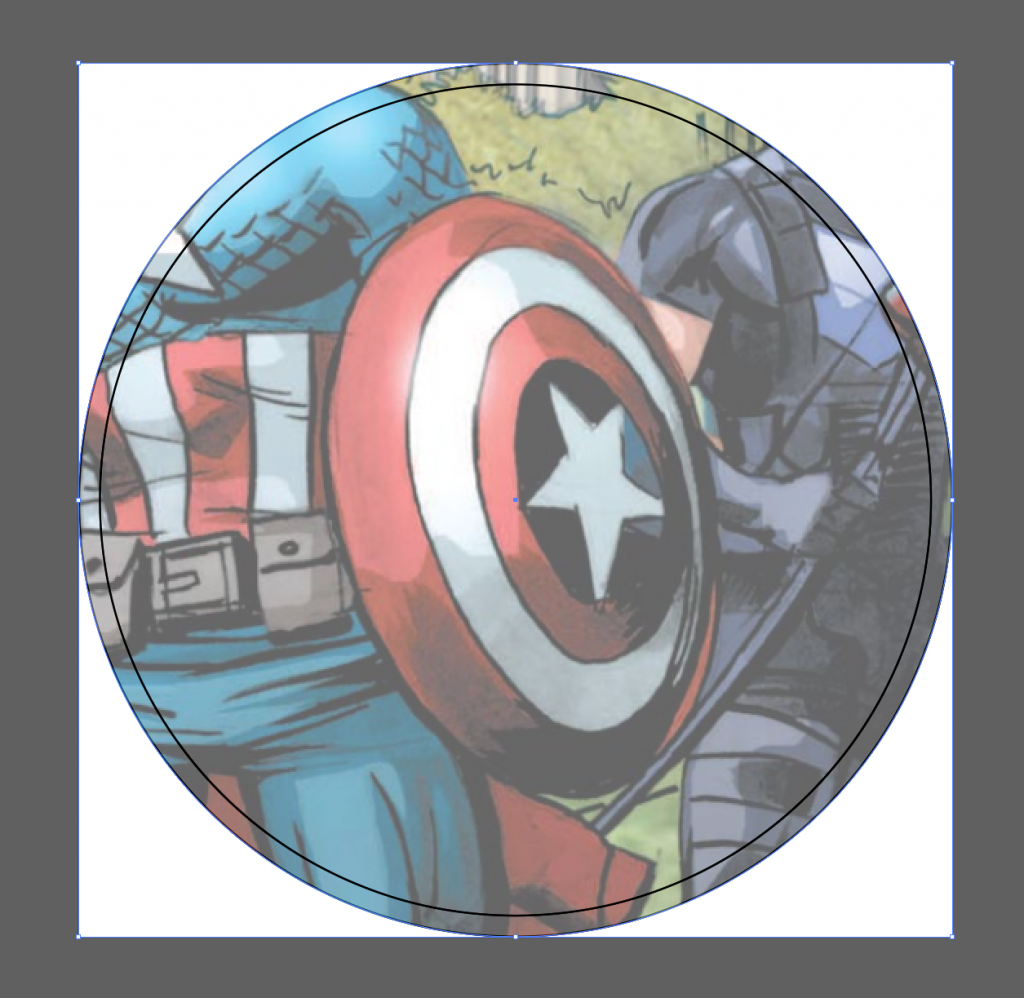
Next, we want to hold shift and select our art and the outer circle. With these two selected, we’re going to make a clipping mask by going to Object > Clipping Mask > Make. This should trim the art to the selected shape, leaving us with a 21 mm circle for our token.
Now for our text, we just need to add whatever text we want. I used the Elektra Medium font, which is close to what is used for the cost value on the official cards. Shout out to the awesome homebrew community discord where you can find all of that info. I achieved a drop shadow by putting a pure black version of it behind the text, and offset it down and to the right.
Printing and Cutting
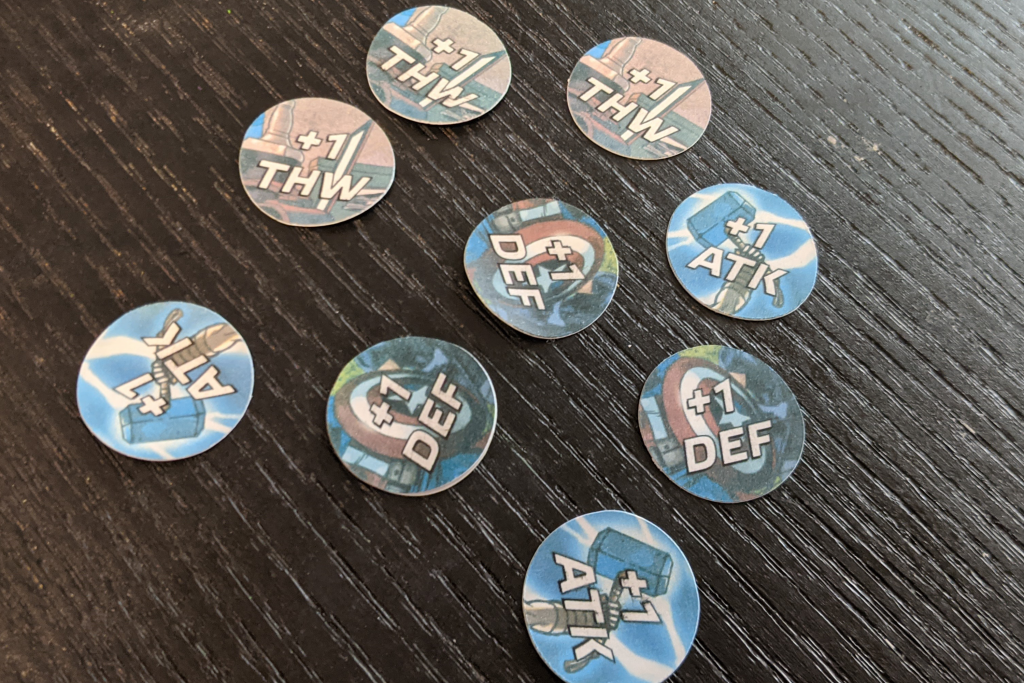
And now comes the more open-ended part. You can import the images into any document, double-check that their size is set appropriately, and print away. I opted for the Silhouette software because I’m going to be using my Cameo for cutting these out. I went with a matte vinyl sticker paper that will work with my printer. Just don’t be like me; Make sure you print on the right side of the sticker paper.
For cutting, you can go high tech, as I did, and use a Silhouette (or a Cricut) machine, or you can opt for a simple paper punch. If you can’t find the exact size you need, I highly recommend checking Etsy. At the end of the day, you should have some cut out token backgrounds ready to go.
Assembling our Glass Tokens
Now it’s time to assemble our glass tokens, sort of like a sandwich. First, peel your sticker and place it in the round metal fitting. Add a few drops of Mod Podge Dimensional Magic to act as our glue. Yes, this is the same thing we used to upgrade the stock tokens. Drop your glass cabochon into the fitting and jiggle it around a bit. You should see the Mod Podge spread out to the edges. Don’t push too hard or it might get squished out the edges.
I let these sit for three hours, per the instructions on our adhesive. I applied a little felt circle to the bottom to make them easier to pick up. You can leave their bottoms naked if you prefer.
The Final Glass Tokens
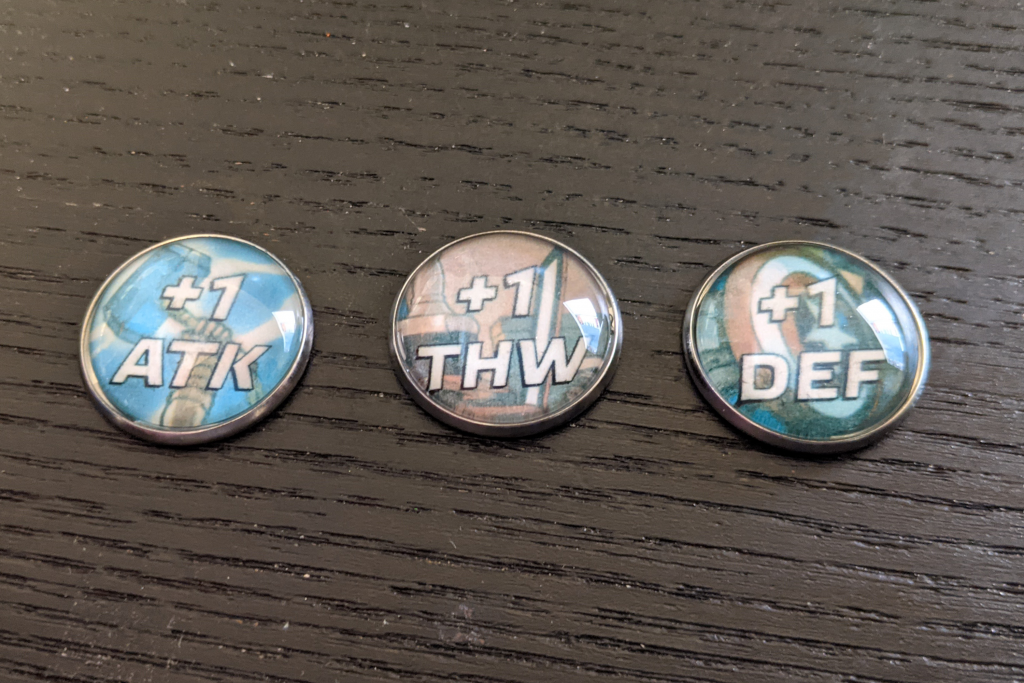
I’m super happy with the way these came out. I hope to add a few of these to my Etsy shop in the coming weeks. Thanks for reading!

Thank you to all our Patreon supporters who help making this content possible, especially:
Dan (KennedyHawk)
Chris C.
Allen
Thomas Giaquinto
If you’d like to support the site, you can use the Amazon affiliate links below. As an Amazon Associate I earn from qualifying purchases. Funds from these links go towards supporting this site.