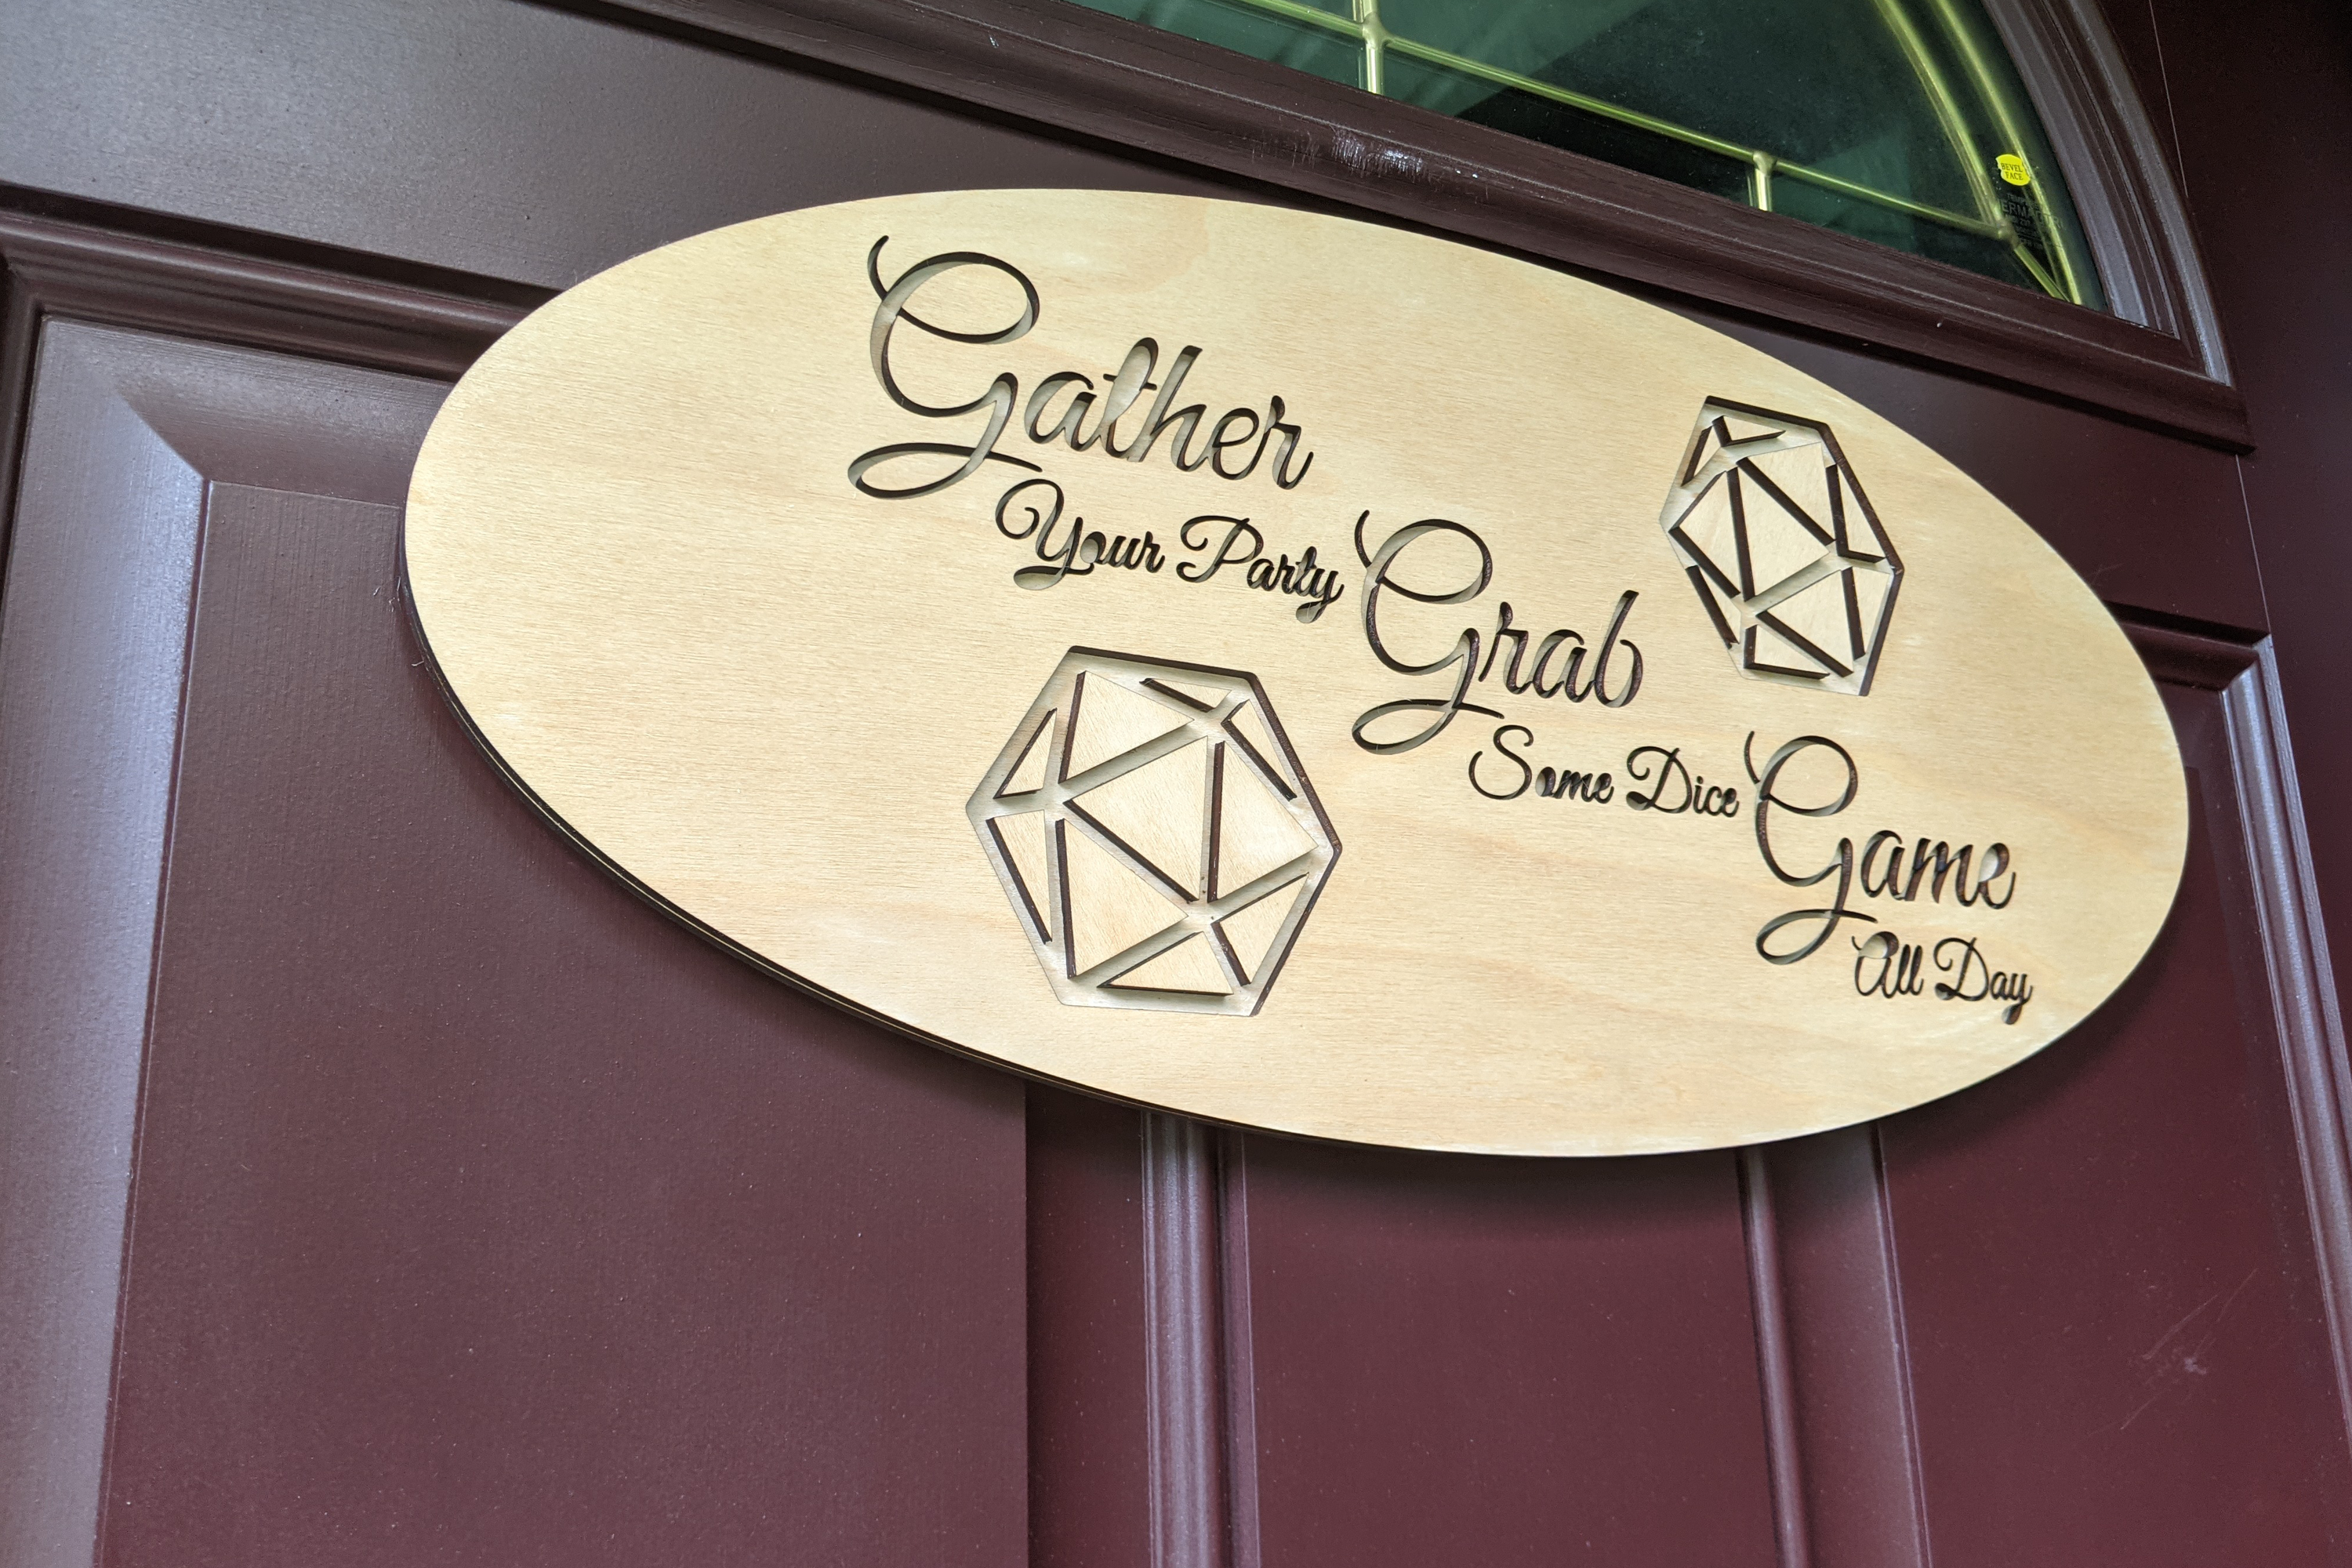
After an overly long and only minorly stressful move, I’m back to crafting! Today I’m adding some gaming decor to the dungeon I call home now. This laser-cut gaming door hanger is going to set the tone for my new house and the gaming I plan on doing here.
Design Phase
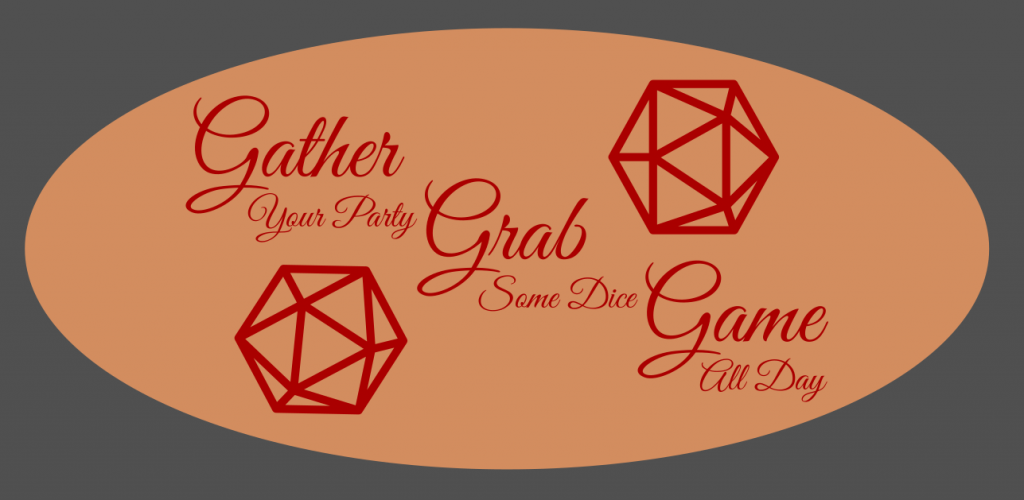
In case it wasn’t clear, this is a bit of a parody of the infamous ‘Live Laugh Love’ signs, but with a D&D twist. I spend a while sifting through those designs to get some ideas for how I wanted to lay this out. Eventually, I settled on all the sizing, spacing, and most importantly, a font. It just wasn’t enough though, so I added some d20s to give this gaming door hanger a bit more character.
Constructing My Gaming Door Hanger
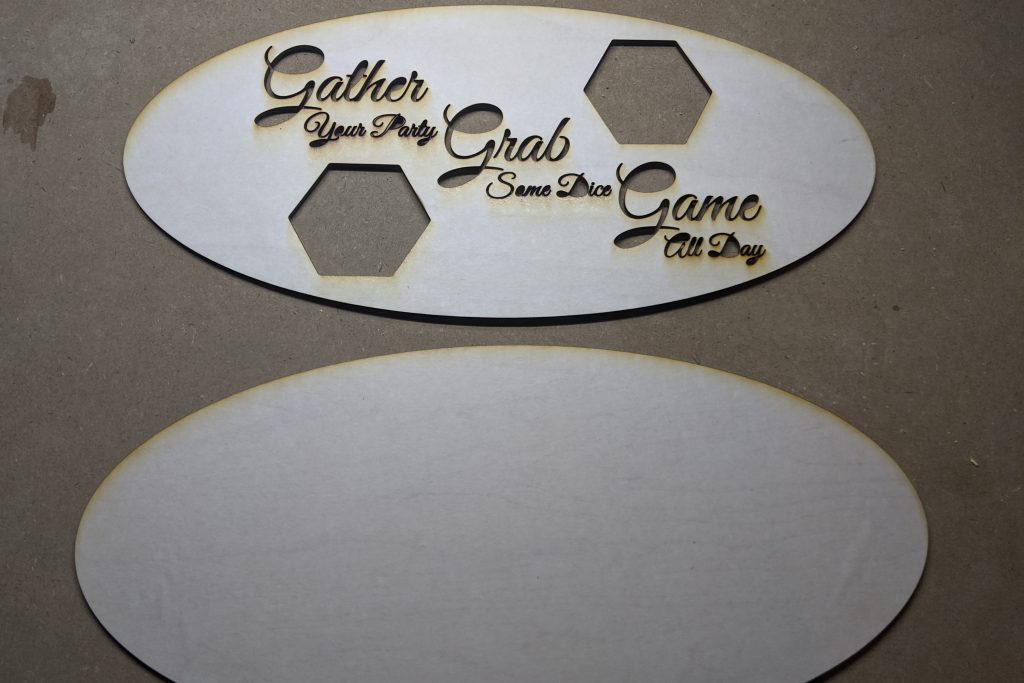
I cut everything on the laser cutter, keeping all of the extra cutouts to use as spacers later. I used 1/8th inch maple plywood since I planned on staining the final product. A generous helping of wood glue connects the back oval and the majority of the face.
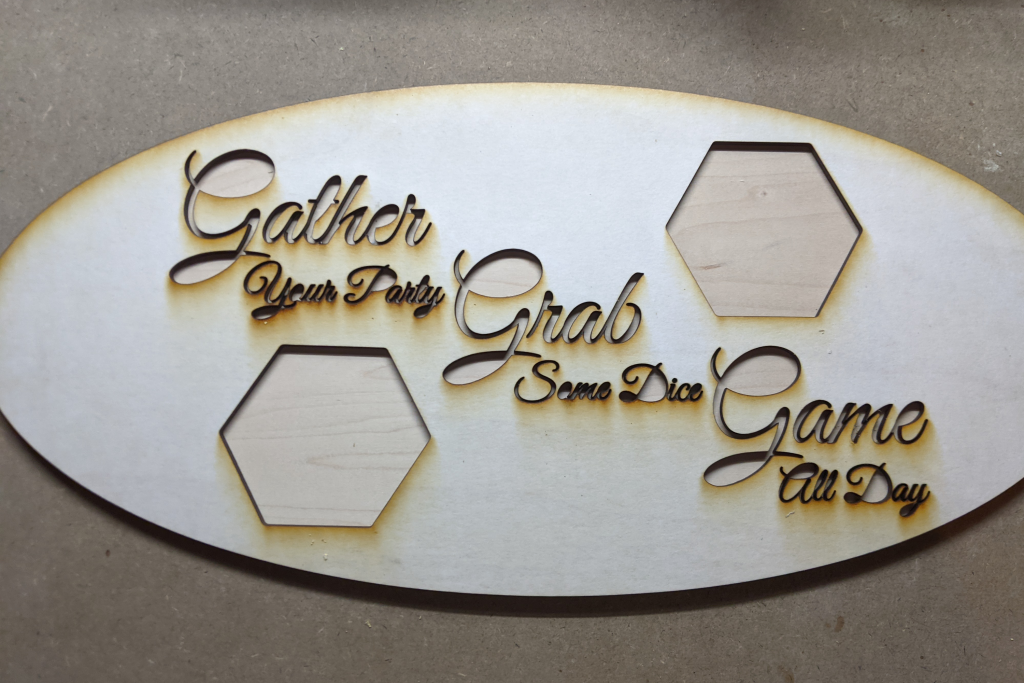
Once the back and face are glued and adequately dried, I inserted the cutouts back into their holes. Since the design uses negative space for the lettering, I need to use the enclosed whitespace inside the characters as spacers. These enclosed pieces of whitespace, like in the middle of an ‘O’, are called counters. A few of the counters were a bit too small and basically disintegrated when I took them out. I tried a few times, but couldn’t get the smaller ones to work, so there are a few omissions.
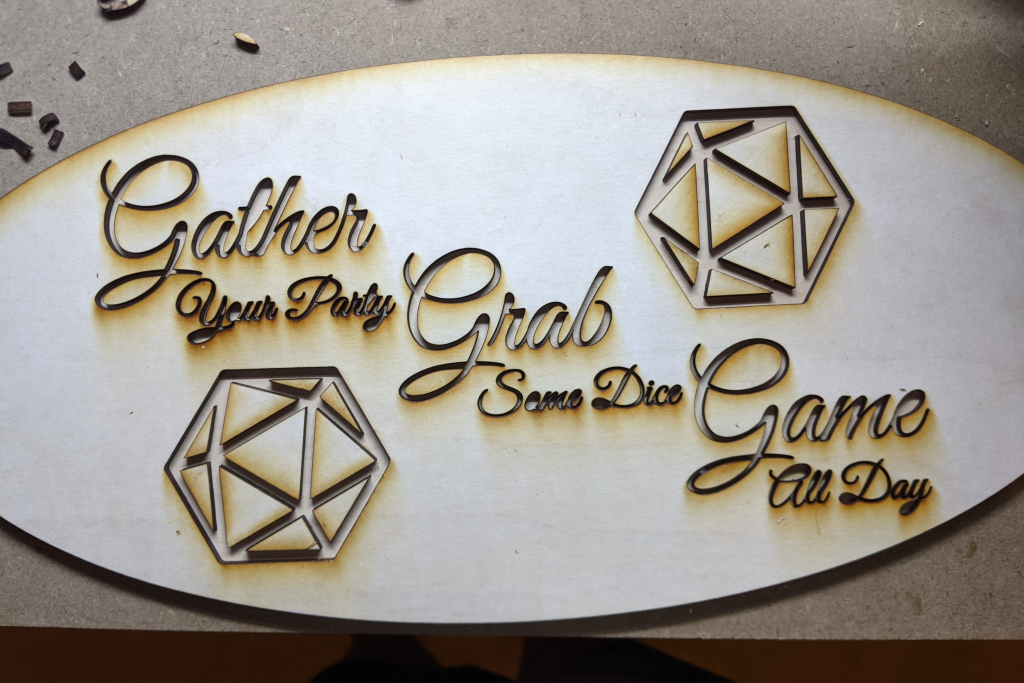
Regardless, once your spacers are inserted (but not glued!), glue the counters into their respective holes. Then with a pair of tweezers, gently extricate your spacers and remove any leftover masking material.
Finishing Up
Once all the pieces are glued down and let to sit for a while, all that’s left is to apply a nice coat or two of finish. I went with a stain and polyurethane combo product to save on time. The color is called pecan, and I’d definitely recommend a few coats. Staining is boring and I forgot to take pictures. Sorry!
Wrapping Up and Lessons Learned

All that’s left is to display this beauty. With some command strips and my trusty level, I hung the finished project on my front door. While I mostly do board game accessory projects, I think this project will be right at home next to the bookends I made.
There are a few issues I’d fix if I could do my gaming door hanger again
- As noted above, the font has some tiny counters that just don’t work with a laser cutter. The loopy font is so great, but the smaller text left some of these pieces unusable.
- The d20 cutouts got jumbled after cutting. I was able to figure out how they should sit, but they still had masking adhered when I glued the pieces down. So I didn’t realise that their grain direction was wrong.
- I originally wanted to fill the negative space with some colored resin. The smaller than expected gaps kinda thwarted me there.

Thank you to all our Patreon supporters who help making this content possible, especially:
Dan (KennedyHawk)
Chris C.
Allen
Thomas Giaquinto
If you’d like to support the site, you can use the Amazon affiliate links below. As an Amazon Associate I earn from qualifying purchases. Funds from these links go towards supporting this site.