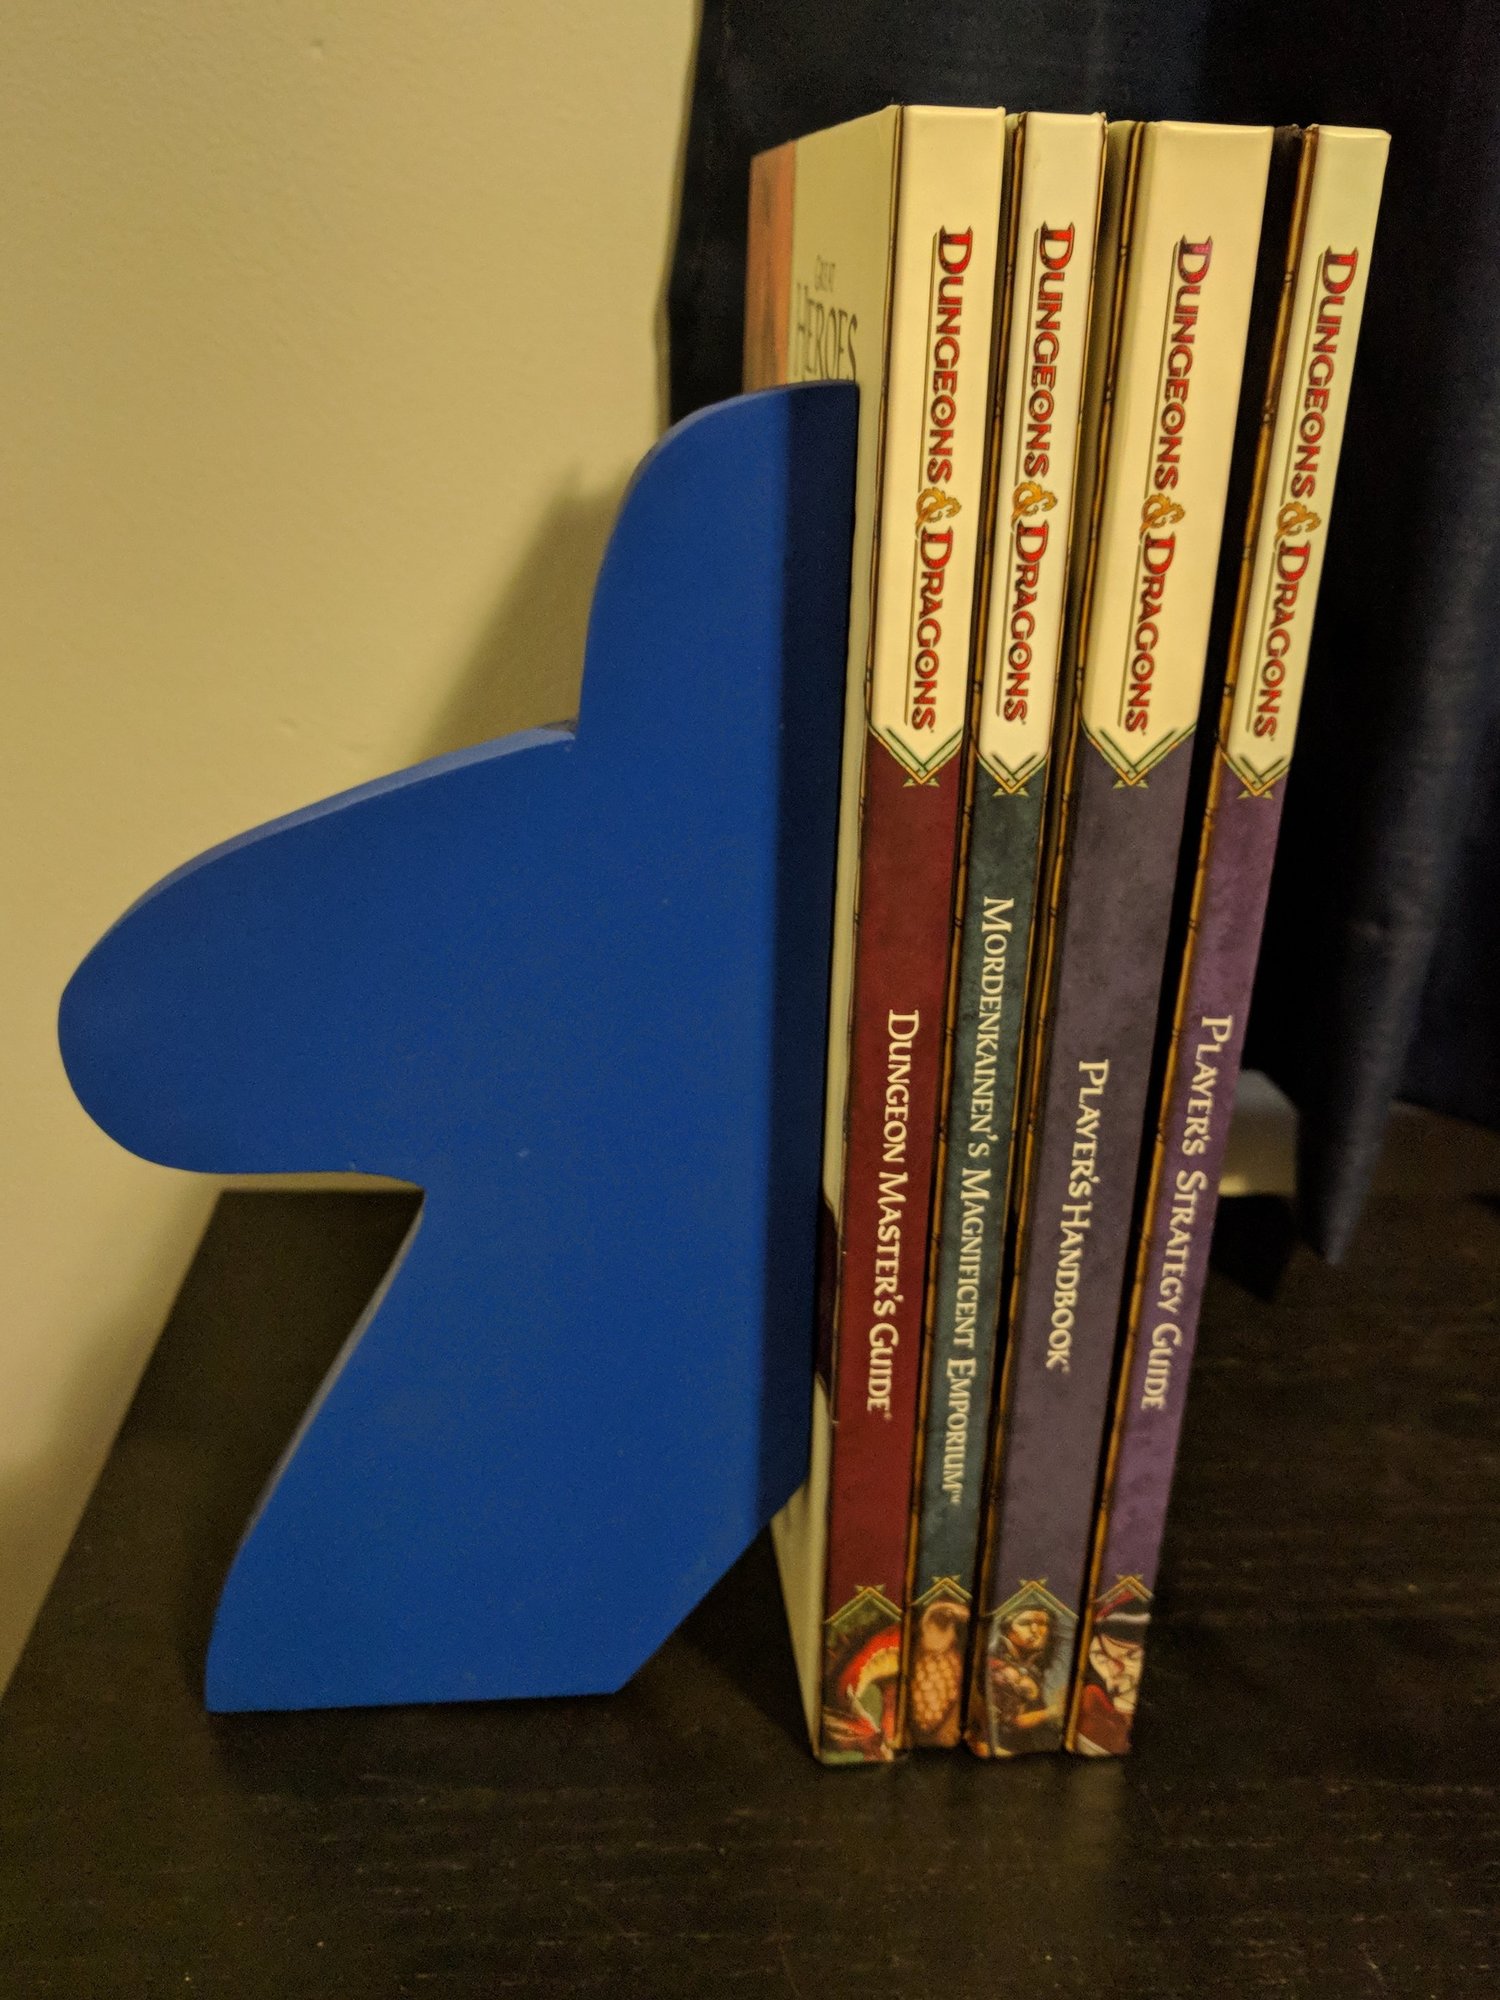
Today we’ll be making a piece of gaming swag to keep a bunch of role playing game books standing proud on the shelf. I wanted this piece to stand out, so I went with an iconic meeple shape in a color that looks straight out the box from Carcassonne.
Tools and Materials
- Jig Saw (and blade)
- Random Orbital Sander (and disks up to 220 grit)
- Adhesive backed sand paper (again, up to 220 grit)
- Drill (and drill bit)
- Clamps
- Speed Square
- Printer (and paper)
- Spray Adhesive
- Compressed Air
- 6 Inch wide board. Depth isn’t important. I used a 1/2 x 6 inch poplar hobby board
- Spray Primer
- Spray paint
- 2 Inch angle bracket
Design

First things first, we need a template. I went over to Noun Project, and did a search for meeple. I found this one to be close enough to the shape I envisioned. I threw it into Inkscape and scaled it proportionally to 10 inches tall. I then placed it just more than 50% on the page so I could print out the shape I’d want to each bookend. I’ve uploaded the template, which you can grab here. This should be printed on letter size paper.
Construction
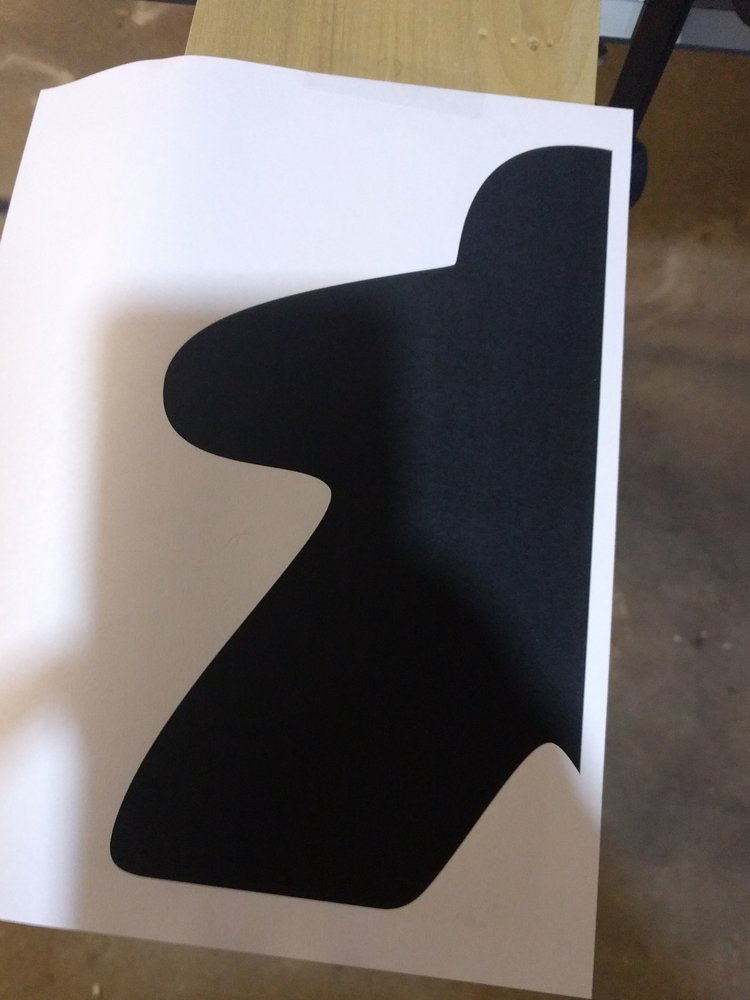
Next, we need to adhere the template to our wood. This is where the spray adhesive comes in. Just give the back of the template and the wood a good spray and then align the center and bottom of our meeple friend with the edges of the board.
Since the paper would always have a margin the template includes more than 50% of the silhouette so we have some wiggle room. I found shining a flashlight up from below helped me get it lined up perfectly. You might see a piece of tape in the picture. I used this to help me do a dry run before I put down the spray adhesive. Looking back, I’m not so sure this was necessary, or even that useful.
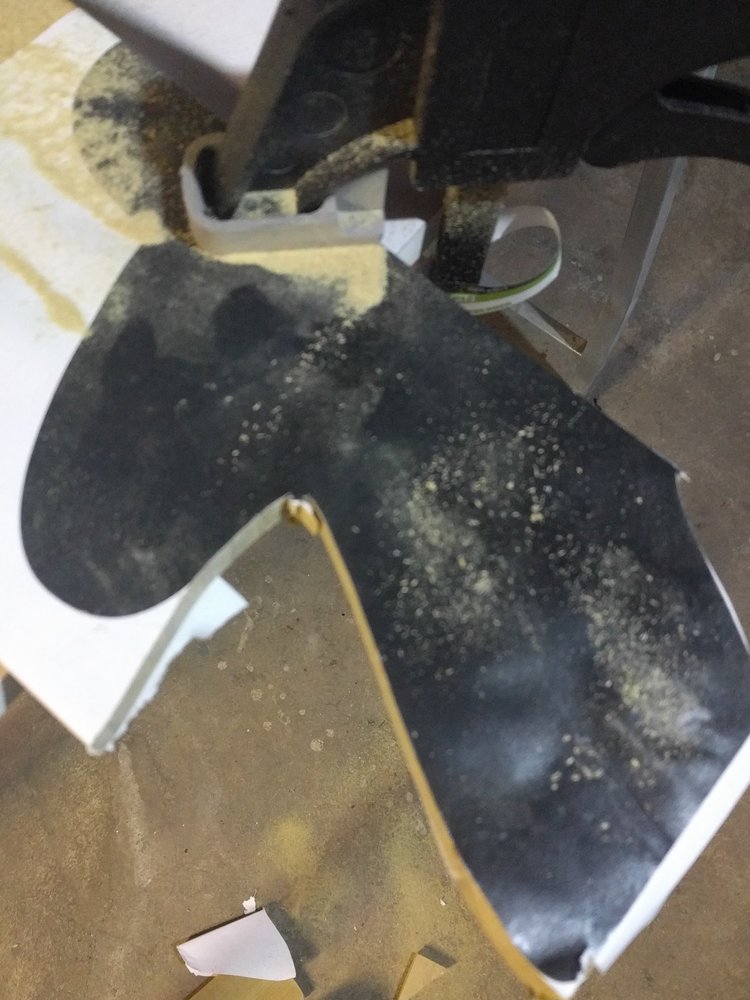
With our template secured, it’s time to clamp down the wood and fire up the jig saw. I started with cutting the board to length by going straight across the top of the template. I set aside the remaining wood for future projects. I then started trimming away excess wood while inching closer and closer to the pattern.
One thing to be mindful of is that the jig saw doesn’t have an amazing cornering ability. For the tighter corners, like the armpit or the neck, I found myself coming from one direction and then attacking the other vertex from the other direction instead of turning. You don’t need to get right up to the lines. You’ll see why soon, but you should use the speed square to make sure that the bottom and inside edge are square.
Finishing

This step, by far, is the longest and most tedious part of the build. Sanding, and painting isn’t super challenging, but does require patience.
I started with a hobby board, so it was pretty smooth to begin with. I skipped my 60 grit paper and started with 120 grit paper. I went over both faces and all of the edges. The edges I couldn’t reach with my orbital sander, I ran across some adhesive backed paper wrapped around the edge of my work bench. Just like with cutting, this was the neck and armpit.
I hit it with some compressed air and resumed with the 220 grit paper, repeating the process. Next is painting, but don’t worry, we’ll be back for some more sanding later.
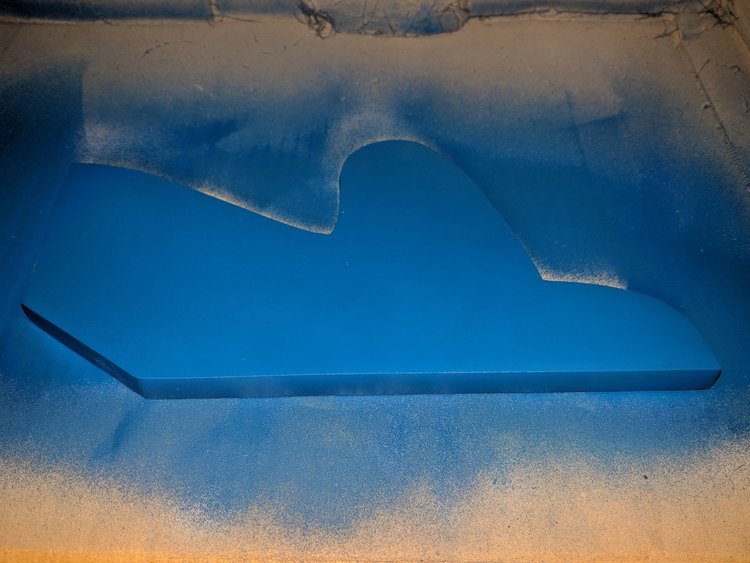
I started by applying two light coats of primer. I use sand-able filler primer to help fill in some gaps and inconsistencies. Once this is dry, get those sanding supplies back out and knock it down a bit. When you’re done take a nice close look at your board. If you have any of those teeny, tiny holes then you might need to do some filler work. Luckily, I didn’t and the primer was doing its job.
Two more light coats of primer and one more round of sanding later, I was ready to lay down some color. I went with a bright blue because I already had it on hand and it fits the theme perfectly. On subsequent coats, make sure you rotate the piece and get all the edges evenly. More sanding, hooray.
One last step
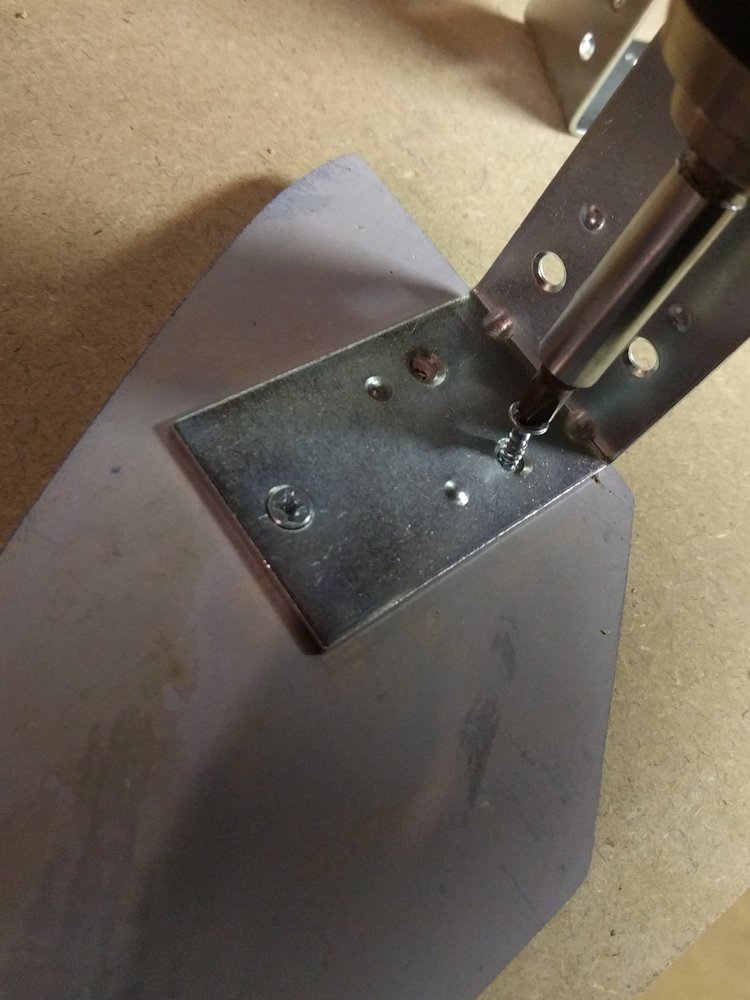
Once you have the desired finish in place, the meeple just needs a little help standing up. I accomplished this with a simple 2 inch bracket. I used the extra bracket for help aligning the one I needed to attach. Then, pre-drill the holes. It would suck to get all the way through however many rounds of sanding just to split a board. Then it’s just a matter of attaching the bracket and enjoying your handiwork.

If you’d like to support the site, you can use the Amazon affiliate links below. As an Amazon Associate I earn from qualifying purchases. Funds from these links go towards supporting this site.