Today we’re building a big d20 out of individual triangles. This project was a bit of an experiment to start off. Figuring out the math to make this work wasn’t too difficult, but this build was really about figuring out the process so I can reuse the techniques in more creative ways later. For this project, we’ll be using a 3D printer, blue tape, and some multi-surface glue. I avoided CA glue because I wanted something to cure a bit slower, so I’d have some time for adjusting the placement.
Math!
The first step was to figure out how to make individual triangles fit together correctly. After some searching, I discovered the angle that I needed is called the dihedral angle. This is basically the interior angle between two intersecting faces of the die. From there, we can manipulate that to find the taper of each piece to have our planes form that angle. For a d20, or regular icosahedron, the angle is about 138.19°. To get our angle, we just need to do 138.19 – 180. This means our tapers need to add up to -41.81°. But, since we have two objects meeting to make up that angle, we divide by 2 or a total of -20.905°. Now that we have the math worked out, we can head over to Fusion 360.
Modelling

First step is to create a drawing of an equilateral triangle. We don’t particularly care about the length of each side, as long as it will fit on your print bed. For this proof of concept, I used a length of 50mm for each side as they’re fairly small, but will still be large enough to work with. The important part is that we use a 60° for each corner. You can do this part manually, or use constraints in the application to enforce them.

Next we’re going to apply that math we did a little bit ago. We’re going to extrude our drawing. During the operation, we’re going to specify the angle we calculated as a taper which will be applied to each resulting face. The depth of the extrusion is a another inconsequential choice. I went with 5mm, which gave me plenty of surface area. Lastly, before exporting to print, I made a smaller triangle and extruded it to remove a bunch of the center mass. This improved print times, and saved on filament.
Assembly
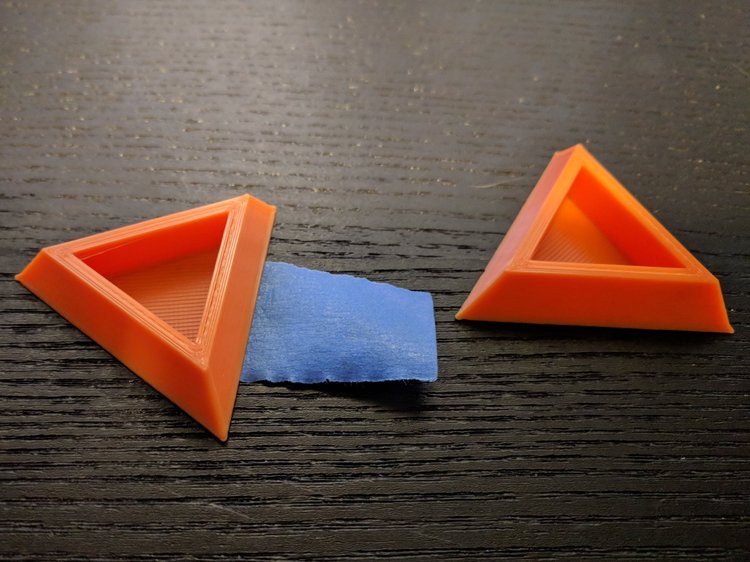
After printing out 20 of these, the next step is assembly. I did this step in a few phases to make it a bit more manageable. I applied some blue tape to pairs of faces to help hold them together. This helped keep everything aligned, while still allowing a sort of hinged movement. I decided against taping the entire length of the edges to be combined because I wanted to be able to see how the faces were coming together.

Next, I applied a liberal amount of glue to one of the edges and folded the faces together. I mentioned before, but I used a multi-surface glue to give me some more work time, but I also found that it’s thickness helped fill the gaps nicely. If you’re looking for a faster cure, you could easily get away with cyanoacrylate if you’re confident in your initial placement. I repeated this glue up for 9 pairs of faces, leaving 2 pieces free for final assembly.

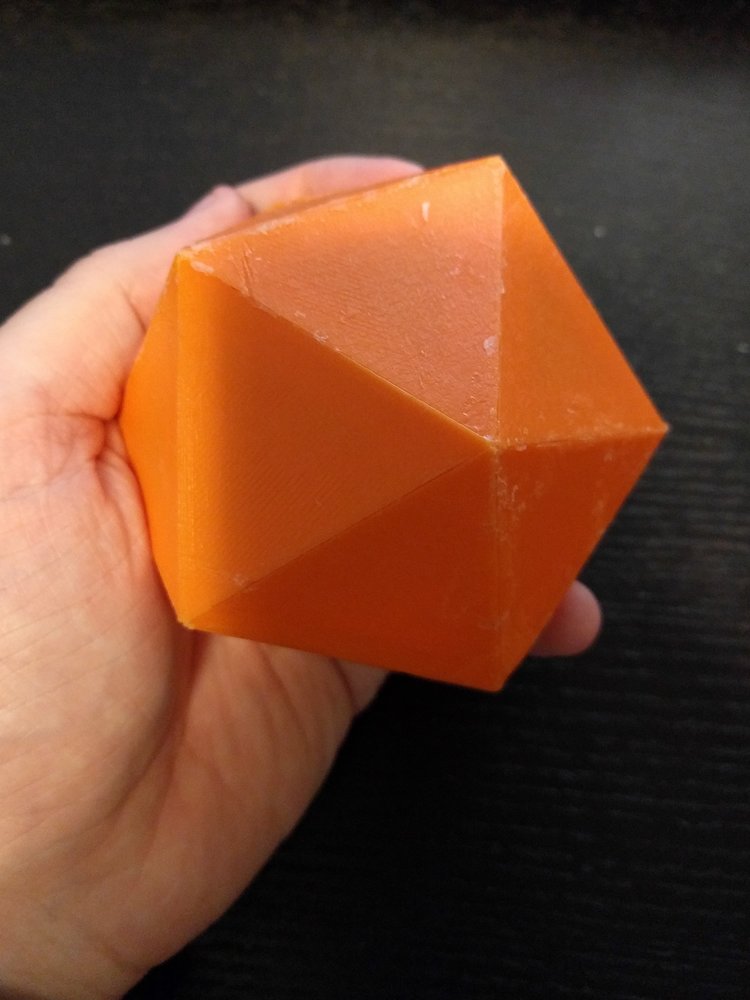
Once these were dry, I started combining them until I had the final product. I’m very happy with it, but for any future applications I need to be more precise during the glue up, as I ended up with a few gaps and a bit of misalignment. This one will remain unfinished, but future builds could easily include some filler putty before paint. I can’t wait to reapply these techniques towards some more creative ideas. If you want to print out the individual faces, you can check out the STL on thingiverse.
If you’d like to support the site, you can use the Amazon affiliate links below. As an Amazon Associate I earn from qualifying purchases. Funds from these links go towards supporting this site.