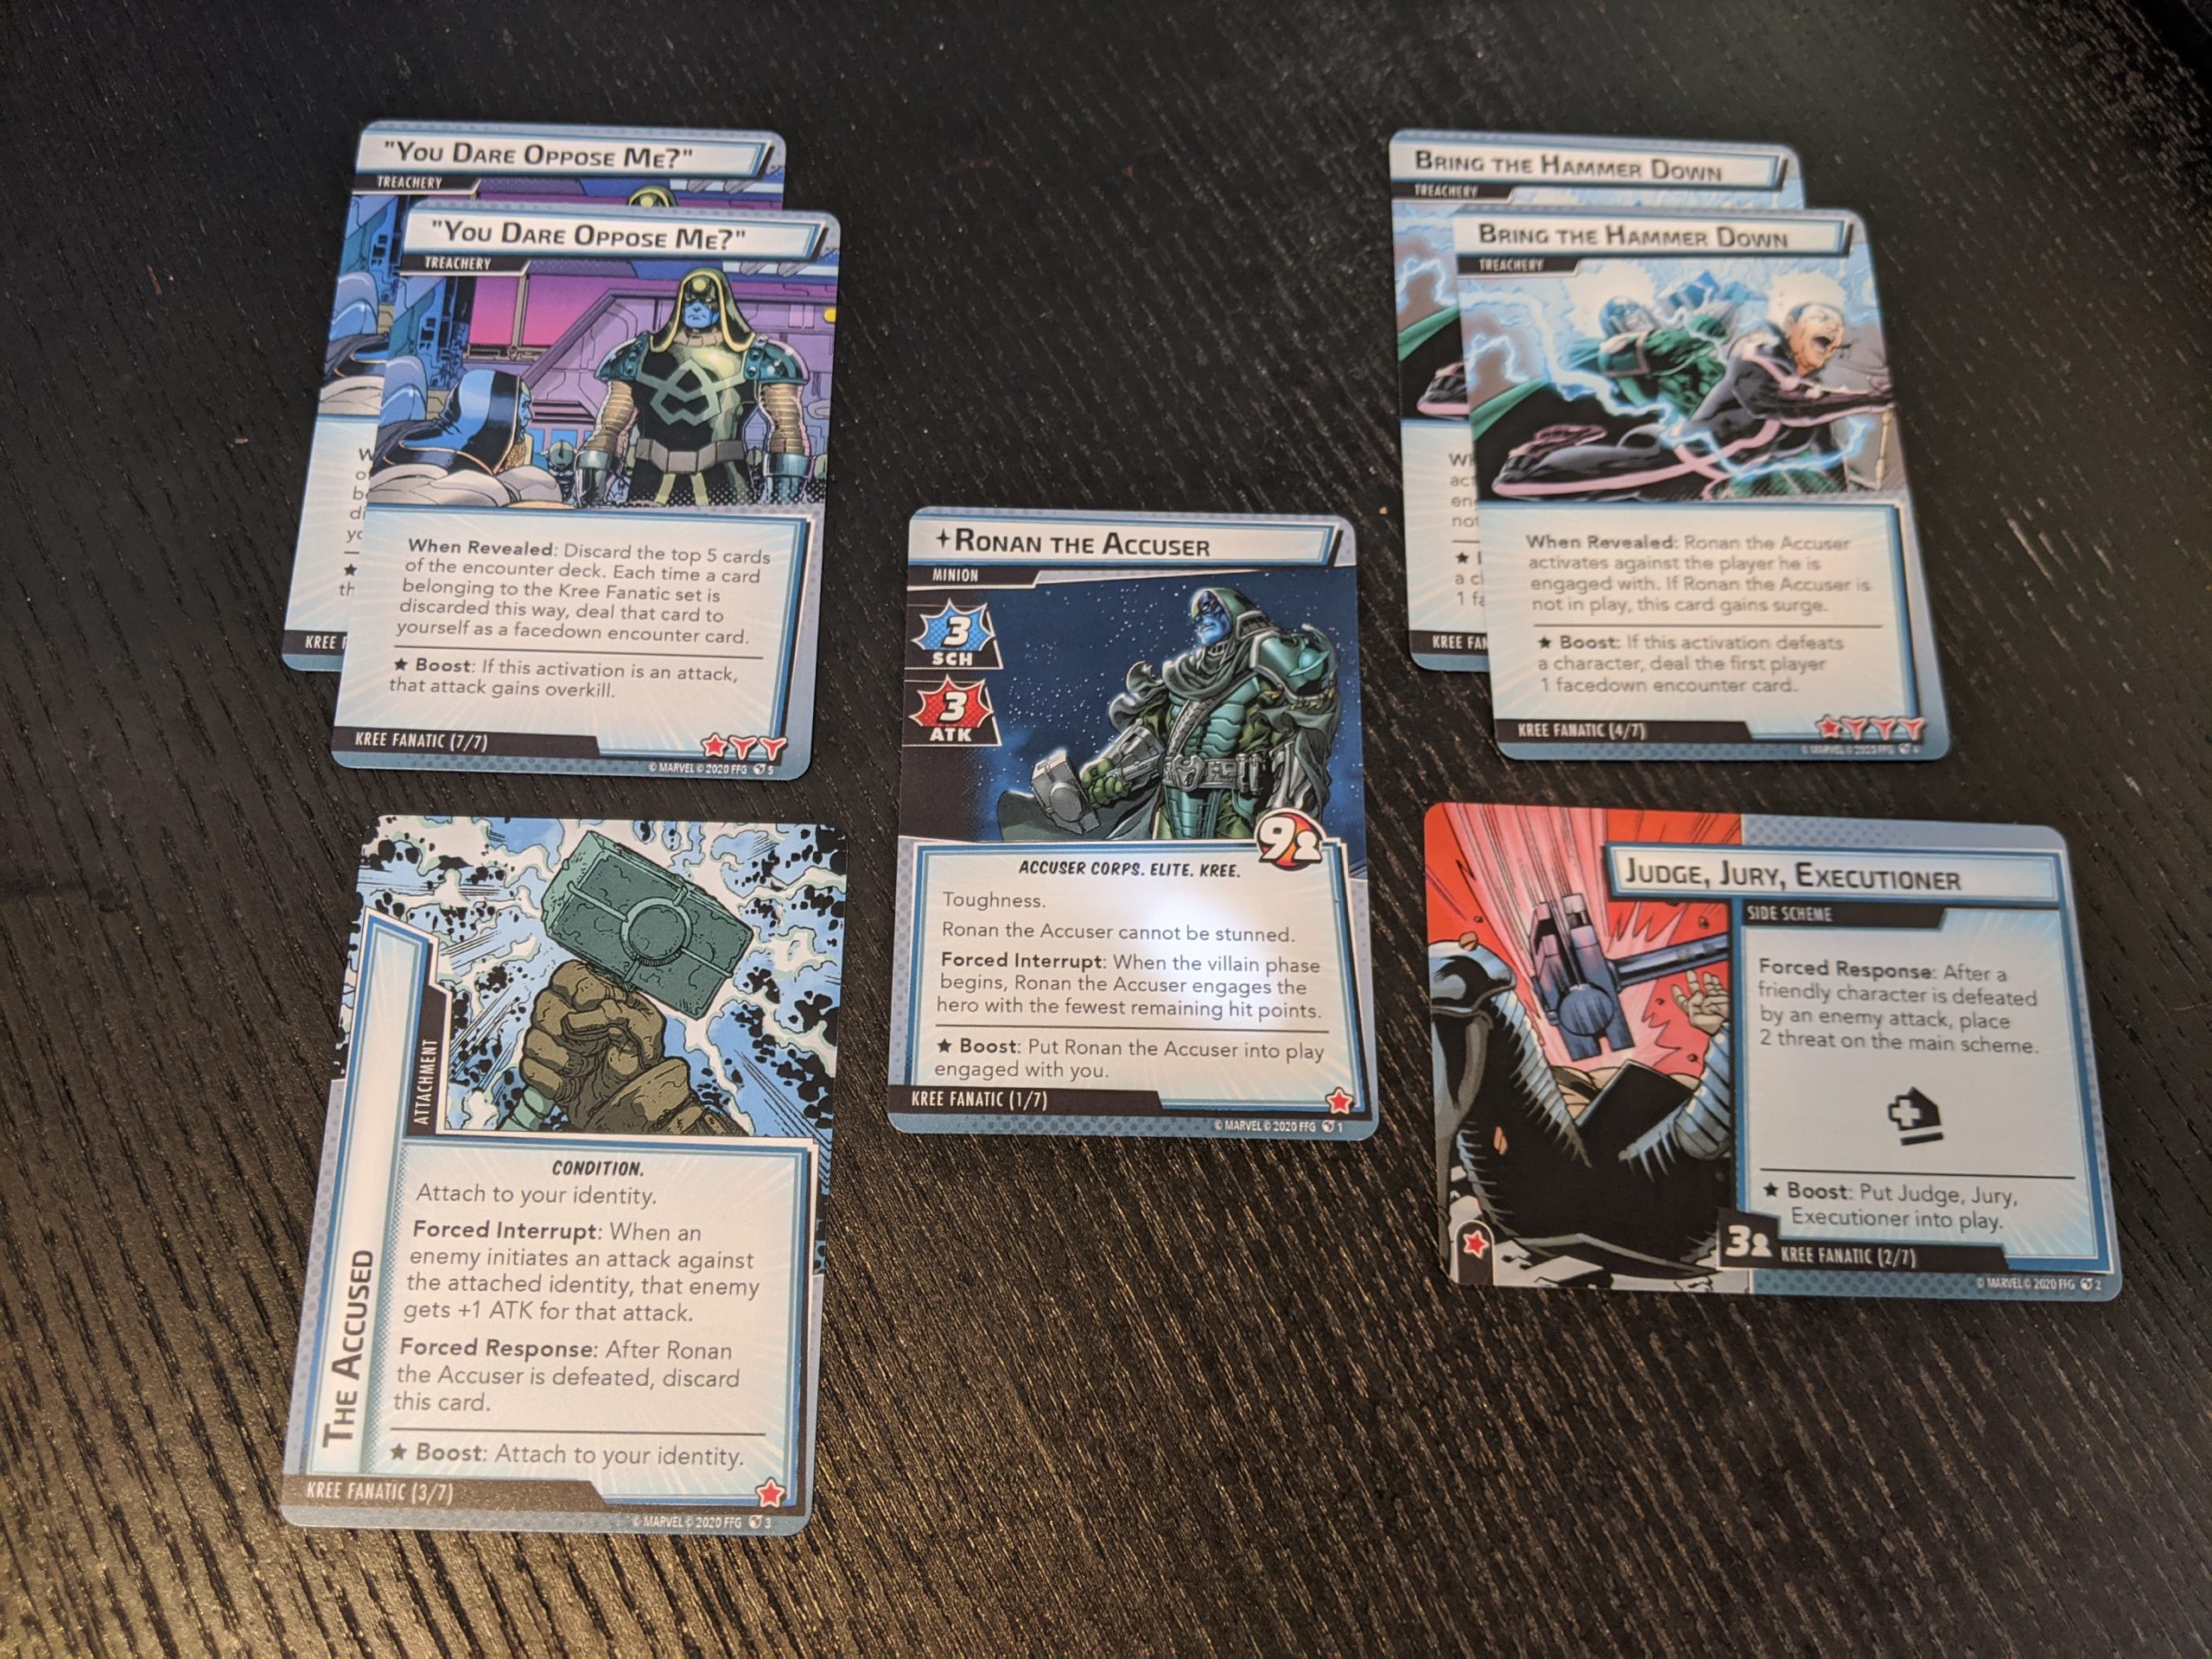
The Kree Fanatic modular encounter set for Marvel Champions was a breath of fresh air in the scenario drought we’ve had for a little bit. To learn how to print the Ronan print and play from a print on demand service, and go from print-and-play to printed-and-played, keep reading! Check out Hall of Heroes for lots of good information on printing these at home.
Update: It seems that Make Playing Cards is often rejecting Ronan PNP files, coinciding with FFG adding personal use only verbiage to their site. Either way, this article covers how to send the files to many services, but I wanted to post that update here for anyone who stops by.
What You Need
- Adobe Photoshop (Gimp or other tools will probably work, but I’m a fan of Photoshop)
- The Print and Play files at a high (300+ DPI) resolution
- A print template from your print on demand service of choice. Here’s a link to the Make Playing Cards one for 63mm x 88mm cards.
Getting Set Up
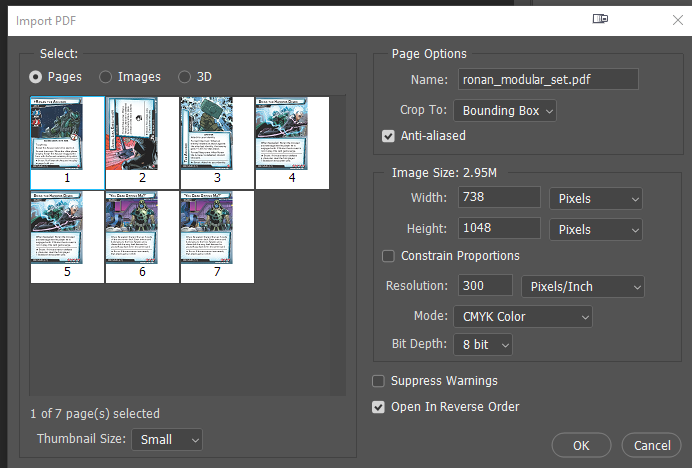
The way Fantasy Flight Games prepared the print and play files makes it very easy for us to convert these files to a print-ready format. Start by opening two files in Photoshop, separately. You’ll want to open the print template and then the print and play PDF. When you open the PDF, Photoshop should prompt you to select which image. We’re going to repeat this process for each card, so I’ll just show the accuser himself for the example. Make sure the resolution is at or above 300 Pixels/Inch. The color mode should also be CMYK, but that’s not as big of a deal.
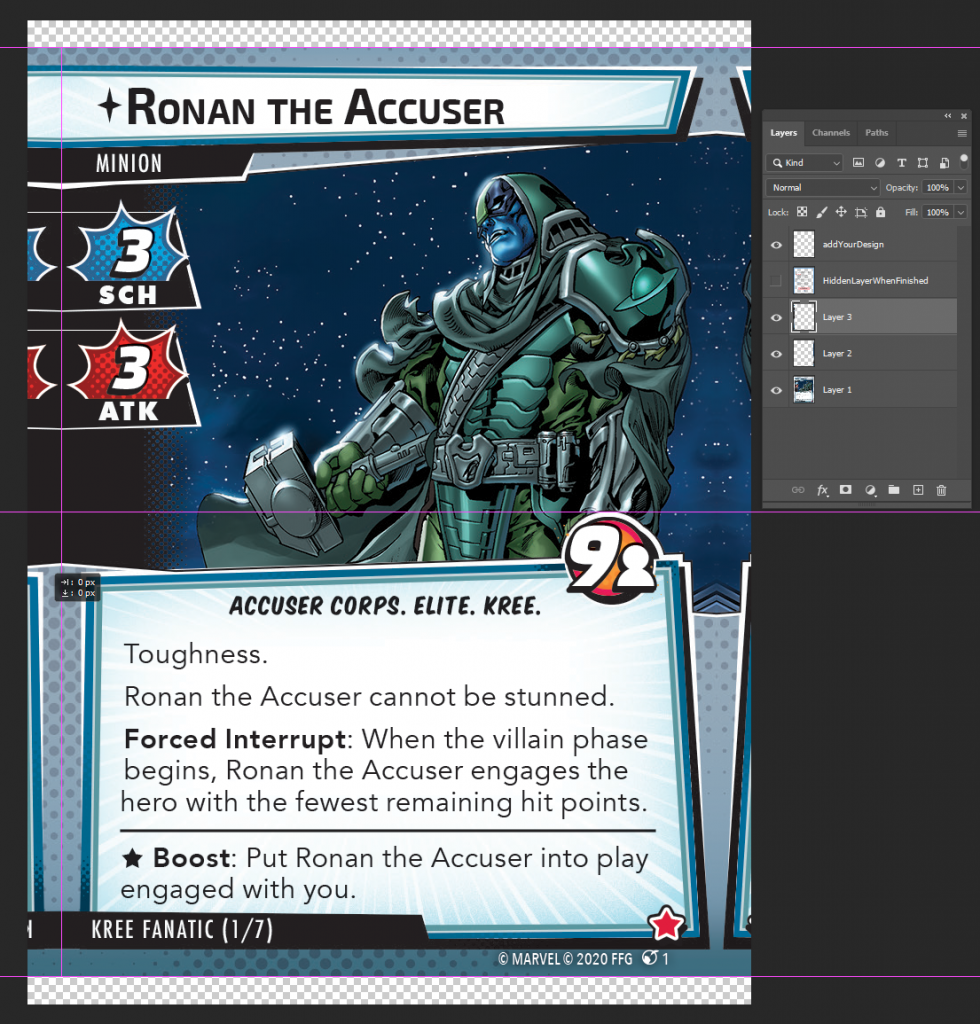
So, now we have some files open. In the print and play tab, find the layers section, and copy the only layer. The hotkey for this is Ctrl+C. Switch over to the template image and paste in the layer (Ctrl+V). You’ll want to move this layer below the “HiddenLayerWhenFinished” layer in that section. That should give you something looking like the next image. Notice the empty space on the left and right.

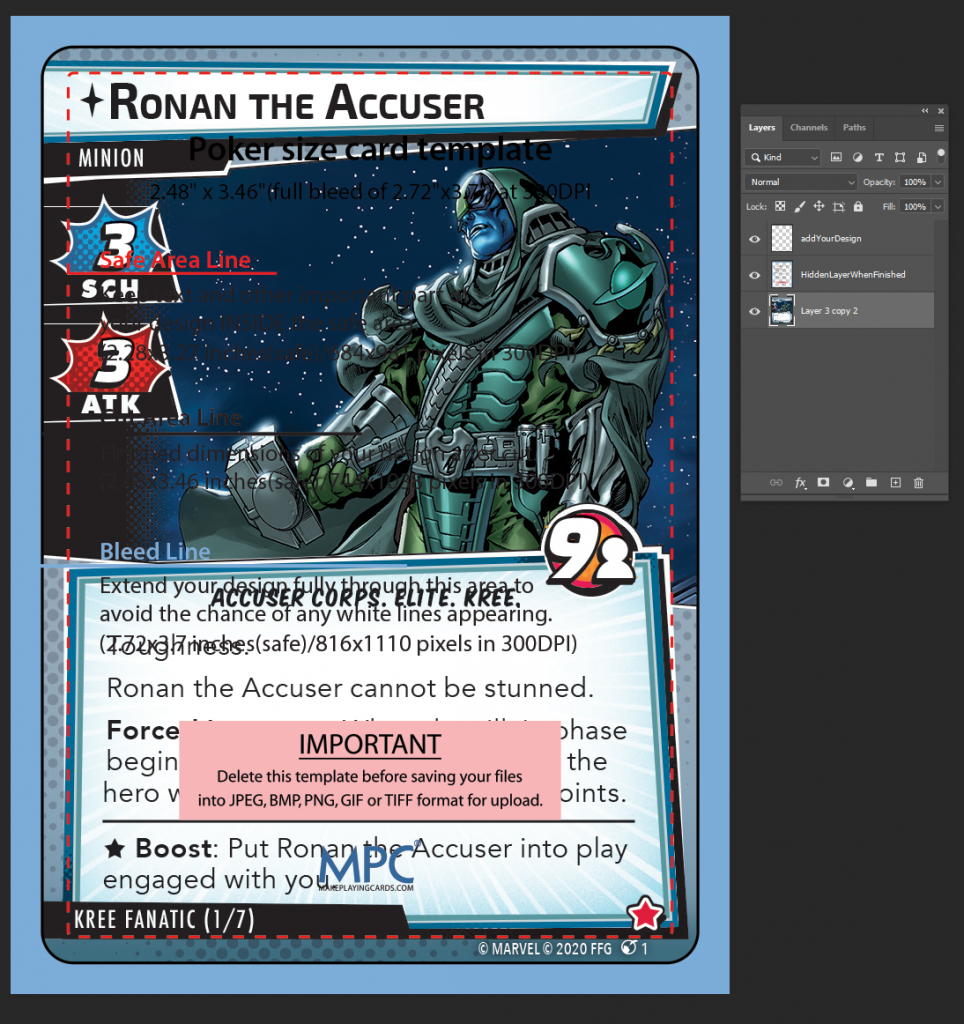
The template tells us a few things about how professional printing works. Everything in the middle, within the red dotted line, is completely safe. That’s why all of the vital information is inside that frame. The portion covered by the blue section is called “bleed”. Anything under here shouldn’t be visible as it’ll be cut off when the cards are produced. But, we have to extend our image completely within this area because there can be small variances in the cutting process. If you don’t fill this area in, you might end up with the raw card stock showing due to this cutting variance. The middle section (between the red dotted line and the blue area) is also relatively safe, but the variance in cutting might shift it a little.
Manipulating the Images
For now, we can hide the template layer by clicking the little eye next to it. Like we talked about above, we know we need to extend the art to fill in the bleed area. We’re going to use mirror images of the file to accomplish this. Copy and paste our image layer twice, resulting in three copies. Hold down shift and select exactly 2 of those layers. With these selected, in the top bar go to Edit > Transform > Flip Horizontal. With two flipped copies, we can line everything up to extend the art through the bleed area. Select one of the flipped layers and drag it to the left, using the pop-up guides to snap everything together. Repeat for both sides. Make sure the original is in the middle.
You can now select all 3 image layers, right-click and “Merge Layers” to combine these three into a single piece. We’re then going to repeat the process for the top and bottom. The only difference is that you’ll flip vertically instead. When you’re done, you can turn the template layer back on and it should look almost the same as it did before, except there won’t be slivers of unused space on the sides.
Almost finished! Turn the template layer back off, and go to File > Export and save your image as a png file. This whole process, with practice, only takes a few minutes per image.
The Flip Side
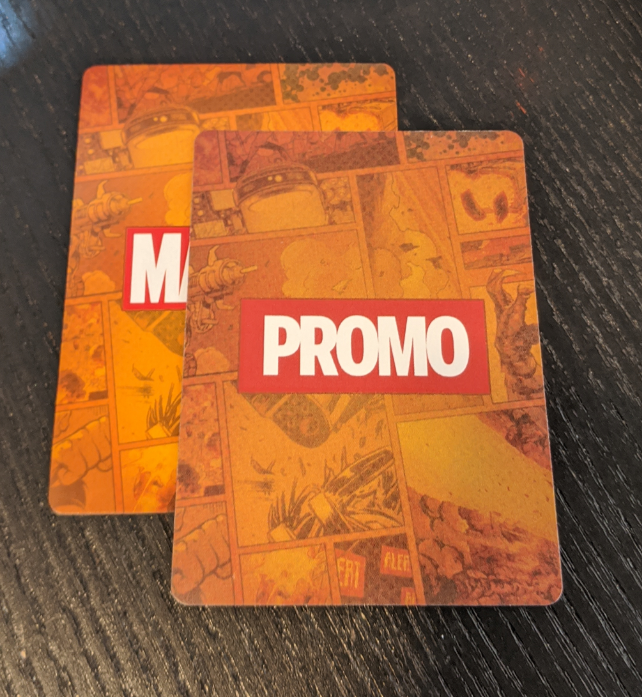
Card backs are a tricky subject when using print-on-demand services. From an intellectual property sense, many of these service providers won’t print the normal card backs because of the prominent Marvel logo. Some people have reported Make Playing Cards allowing the standard backs, but they rejected it for me. I set up this card back with the word “Promo” stylized in the same way. You can download it here. The color match isn’t perfect, but since I need to sleeve anyway to account for the non-standard back, it’s not a hill I’m willing to die on.
How to Print the Ronan Print and Play with Make Playing Cards
Up until now, we’ve covered the setup process then how to print the Ronan print and play. And truthfully, we’re at the finish line. You can head over to Make Playing Cards and start filling out the form. With your newly prepared files, this should go smoothly. If you were to try this with the raw files, the site would complain about the images being low-resolution. That’s basically the problem we solved above. If you have issues, feel free to reaching out and I can lend a hand.

Thank you to all our Patreon supporters who help making this content possible, especially:
Dan (KennedyHawk)
Thomas Giaquinto
Chris C.
If you’d like to support the site, you can use the Amazon affiliate links below. As an Amazon Associate I earn from qualifying purchases. Funds from these links go towards supporting this site.